Introduction
Importing clients allows you to quickly add multiple client records to your system at once. This is useful when migrating data from another platform or managing a large client database. Follow these steps to efficiently import client information.Step 1
Navigate to the Clients Section
Click “Clients” in the side menu to access the client management dashboard. This section contains all registered customers and tools for managing client data.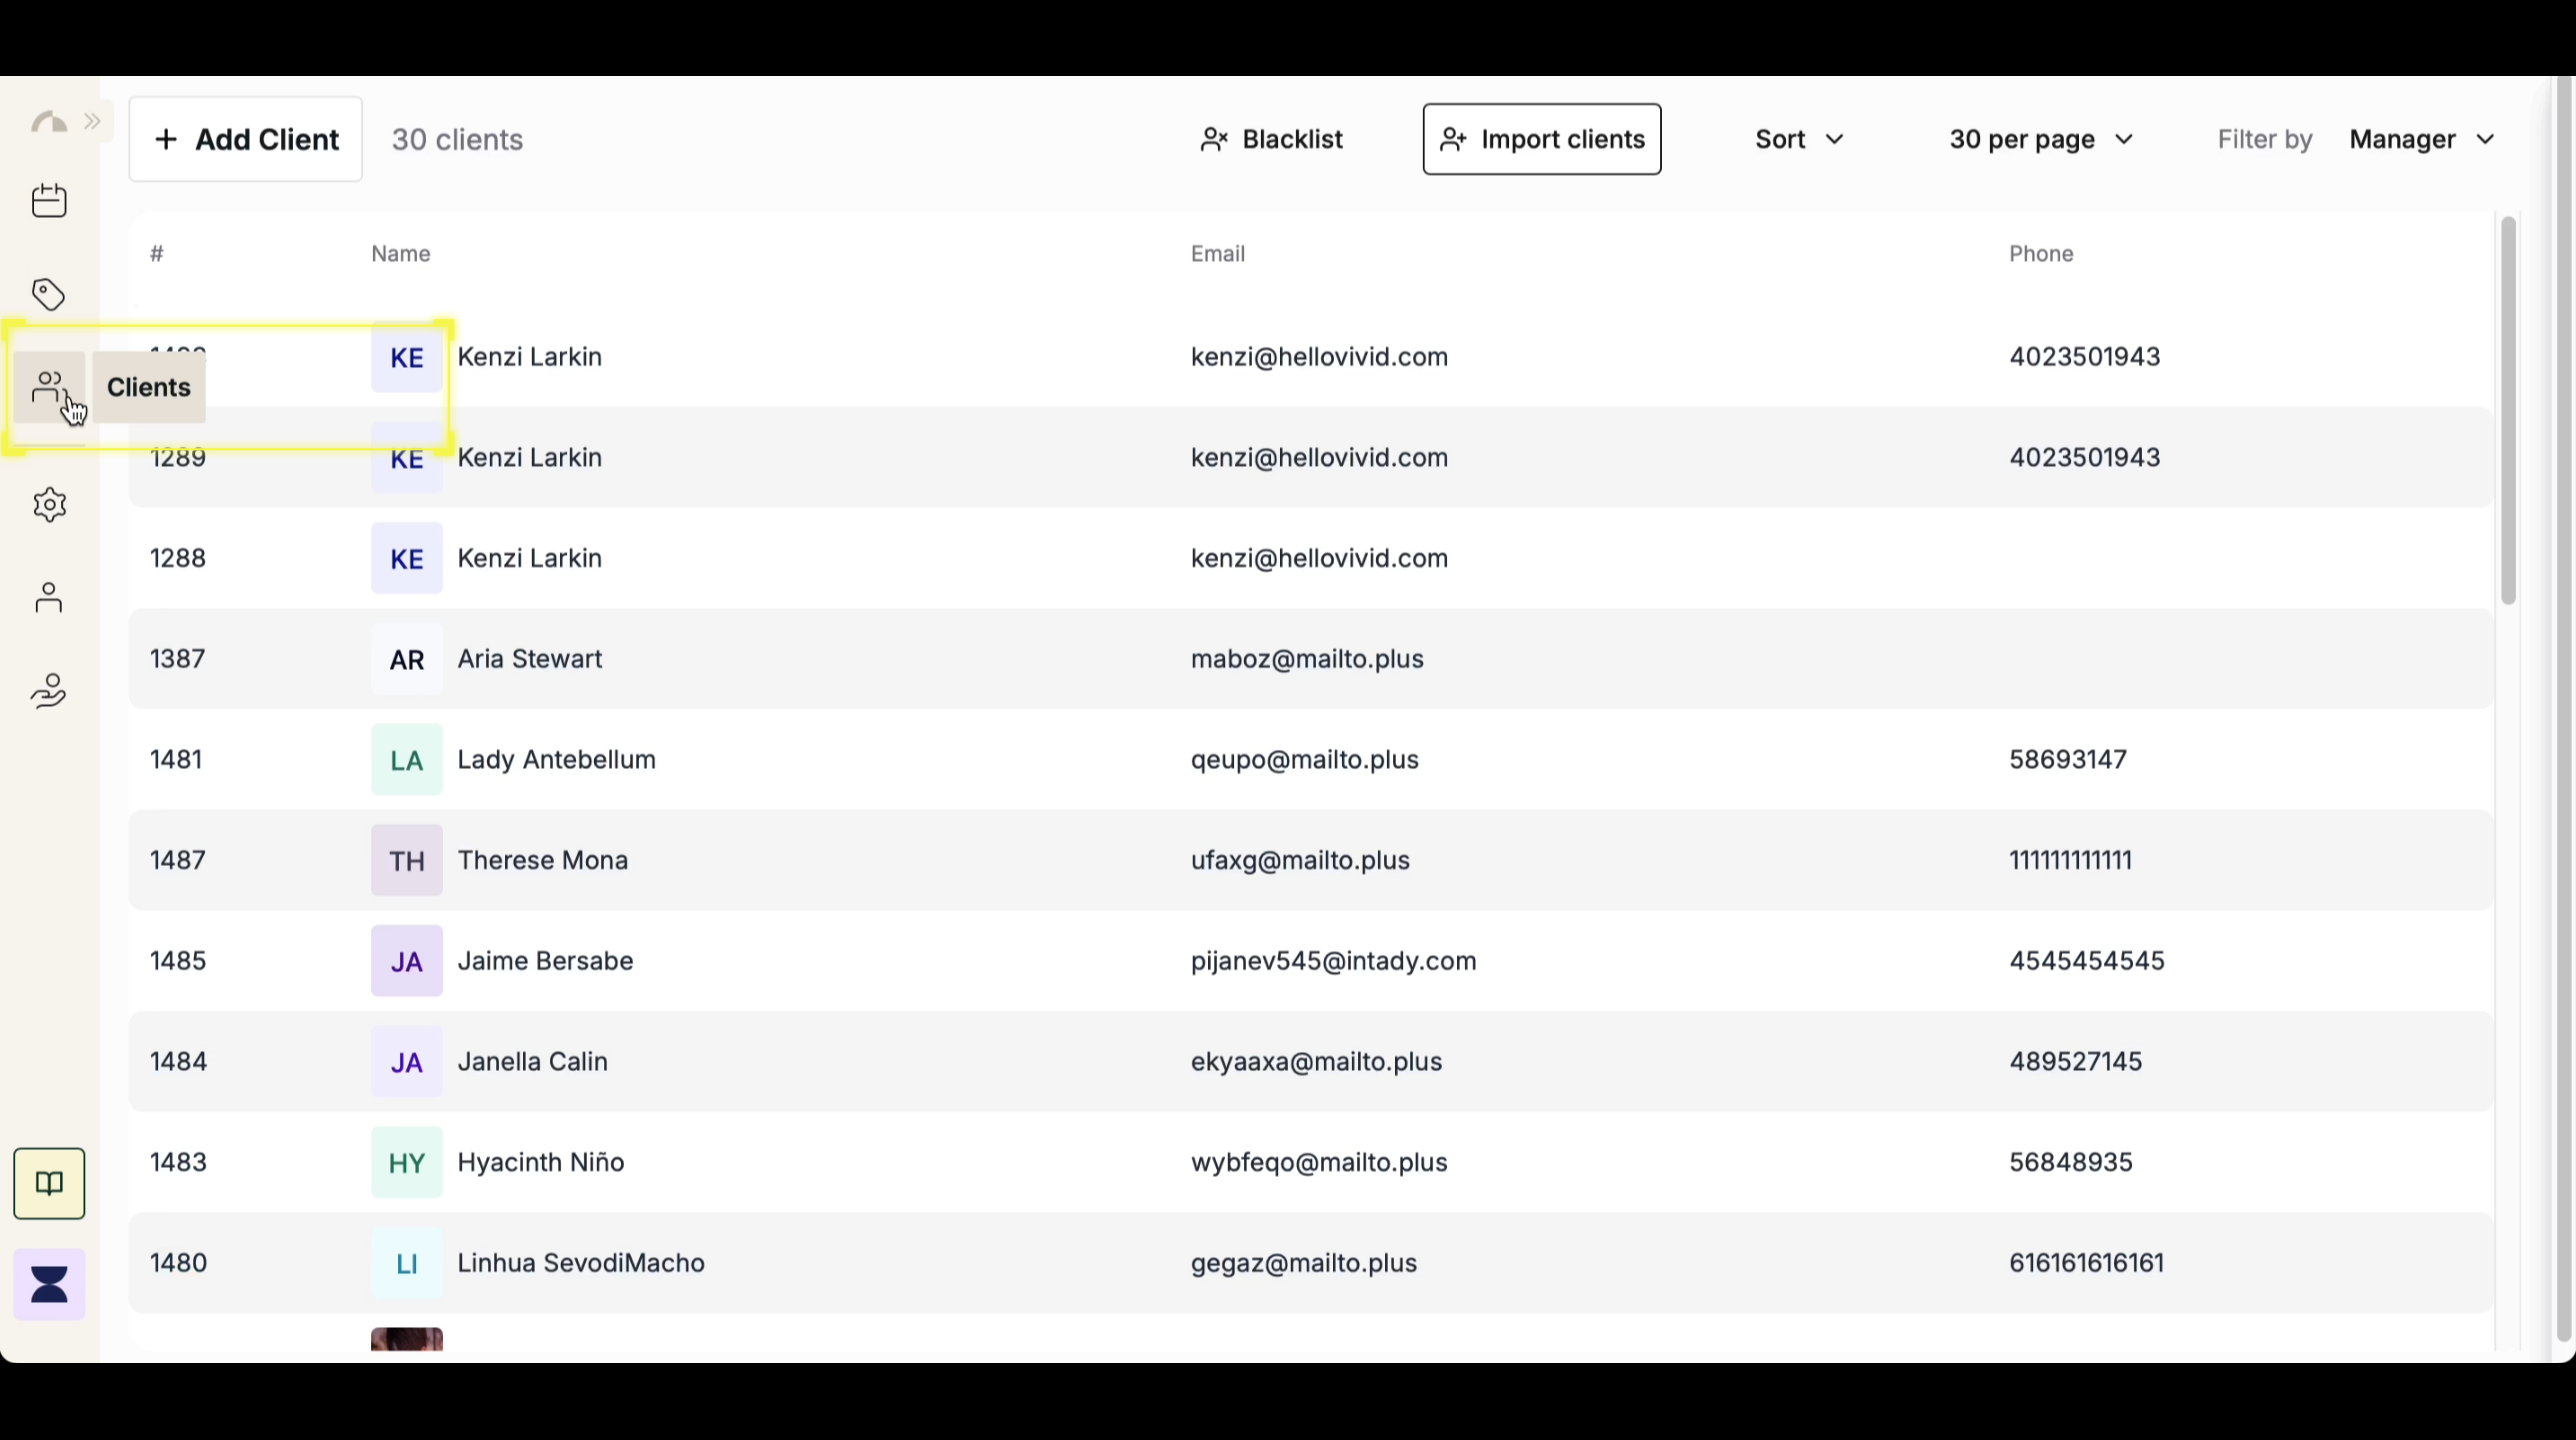
Step 2
Click “Import Clients”
At the top of the Clients section, click the “Import Clients” button to begin the upload process.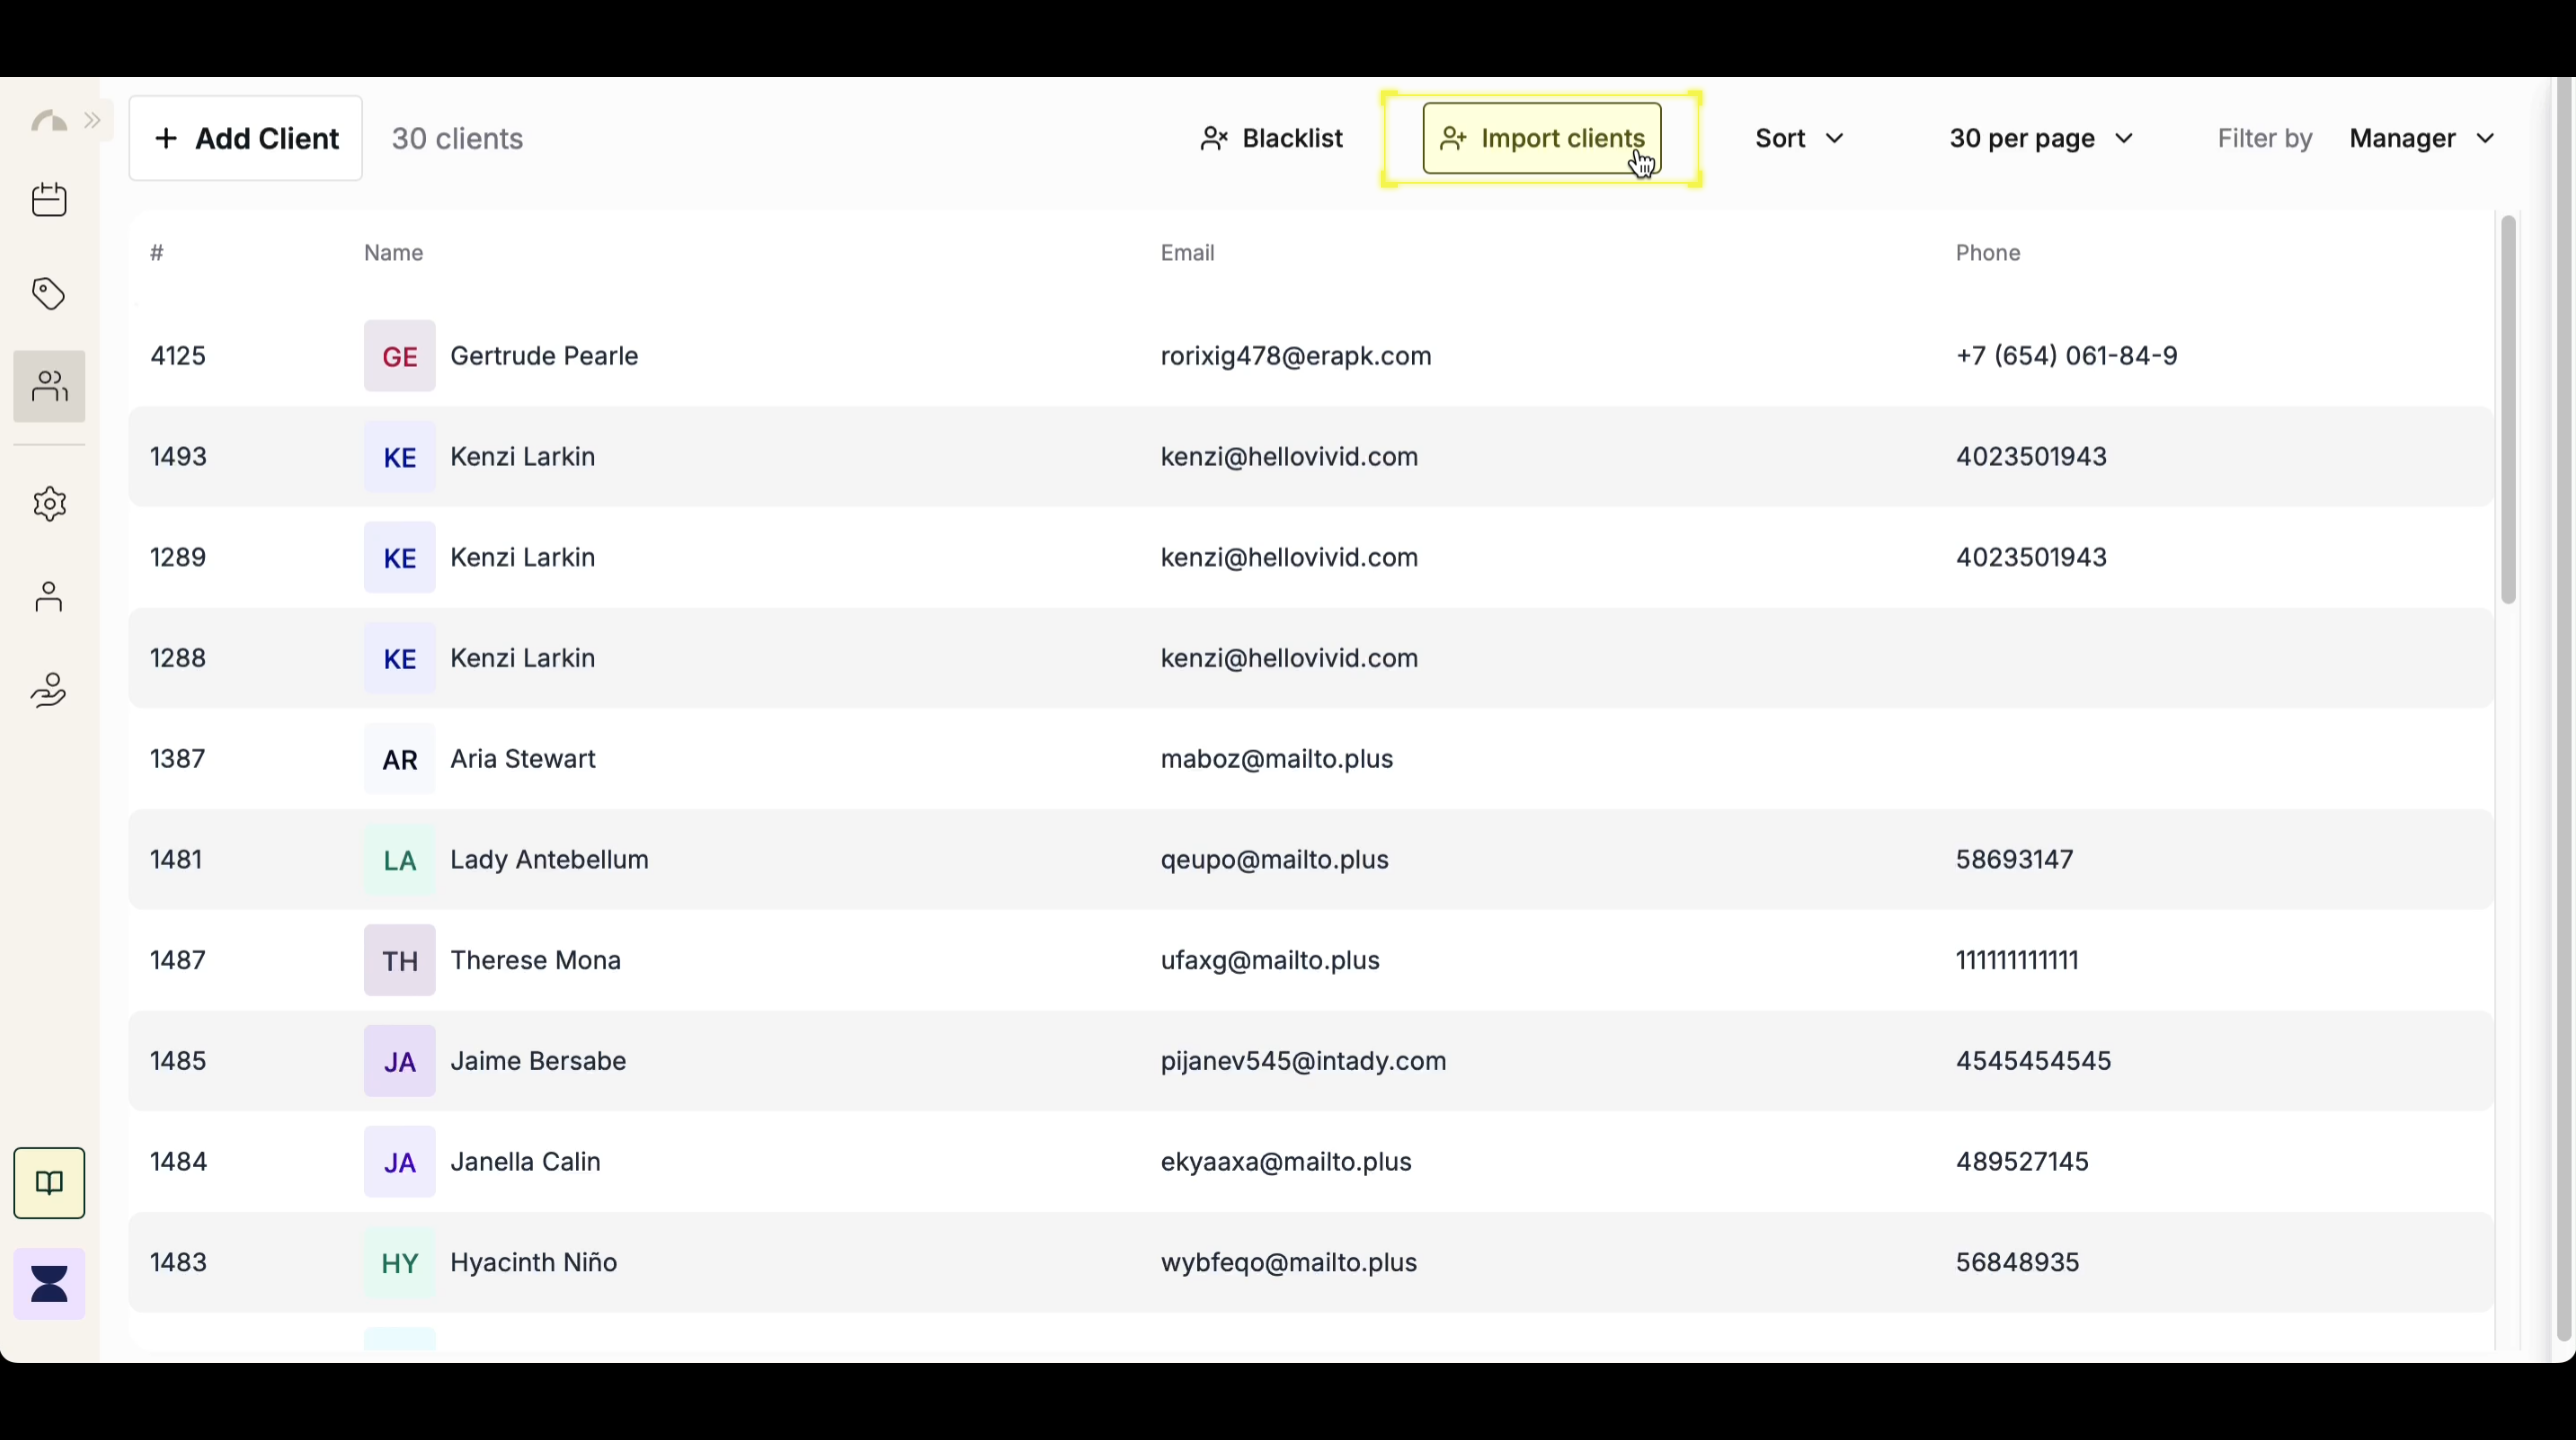
Step 3
Upload Client File
Click the upload area or drag and drop your client file into the designated section. The system supports common file formats such as CSV for easy data import.
Step 4
Map Fields
After uploading the file, map the imported fields to match the system’s required fields (e.g., First Name, Last Name, Phone). Ensuring that all fields are correctly aligned helps prevent data mismatches.
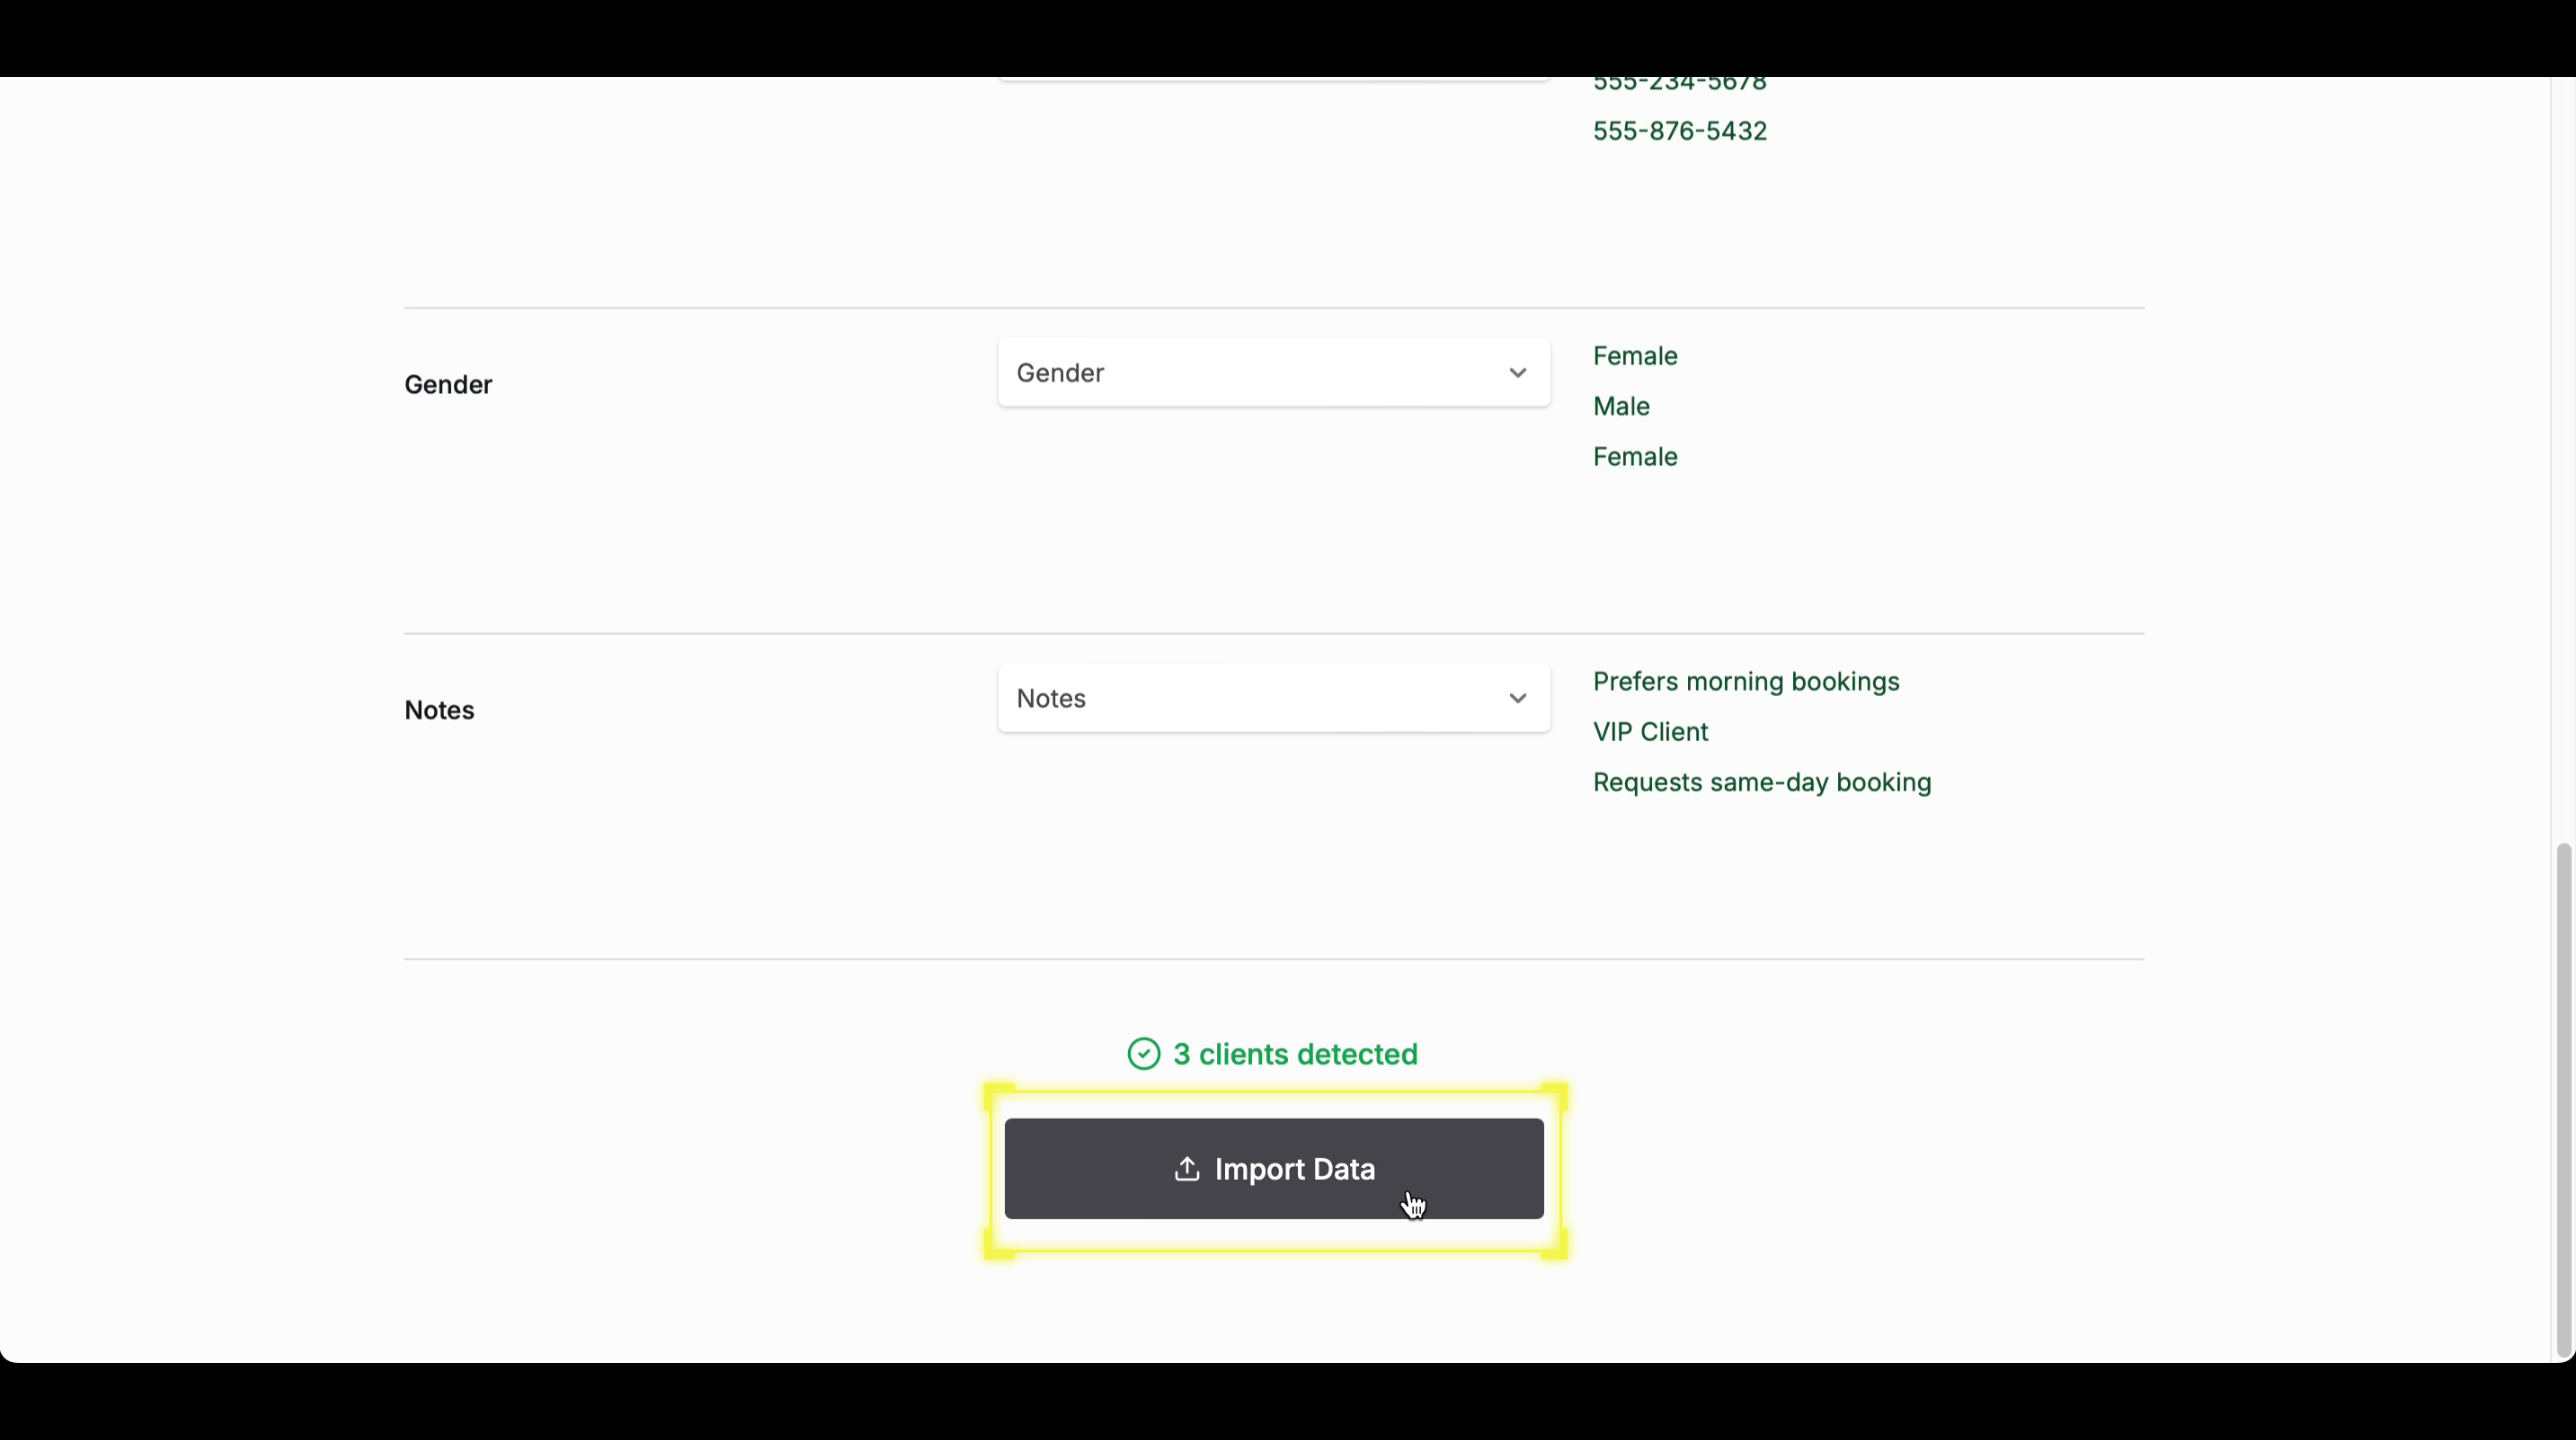
Step 5
Confirm Import
Once all fields are correctly mapped, click “Import Data” to finalize the process. The system will then import the client records, making them available in your client database.