Introduction
Exporting your client list from Fresha gives you a complete overview of your customer data. Whether you’re switching to All Set or simply backing up your records, you can export your list in just a few steps—on both desktop and mobile.On Desktop
Step 1
Open Your Clients List
Log into your Fresha account on desktop, then go to the Clients section from the main menu.Step 2
Review Duplicate Profiles
At the top of the client list, Fresha will flag any duplicate profiles. Click Review & merge to combine them before exporting to ensure clean data.Step 3
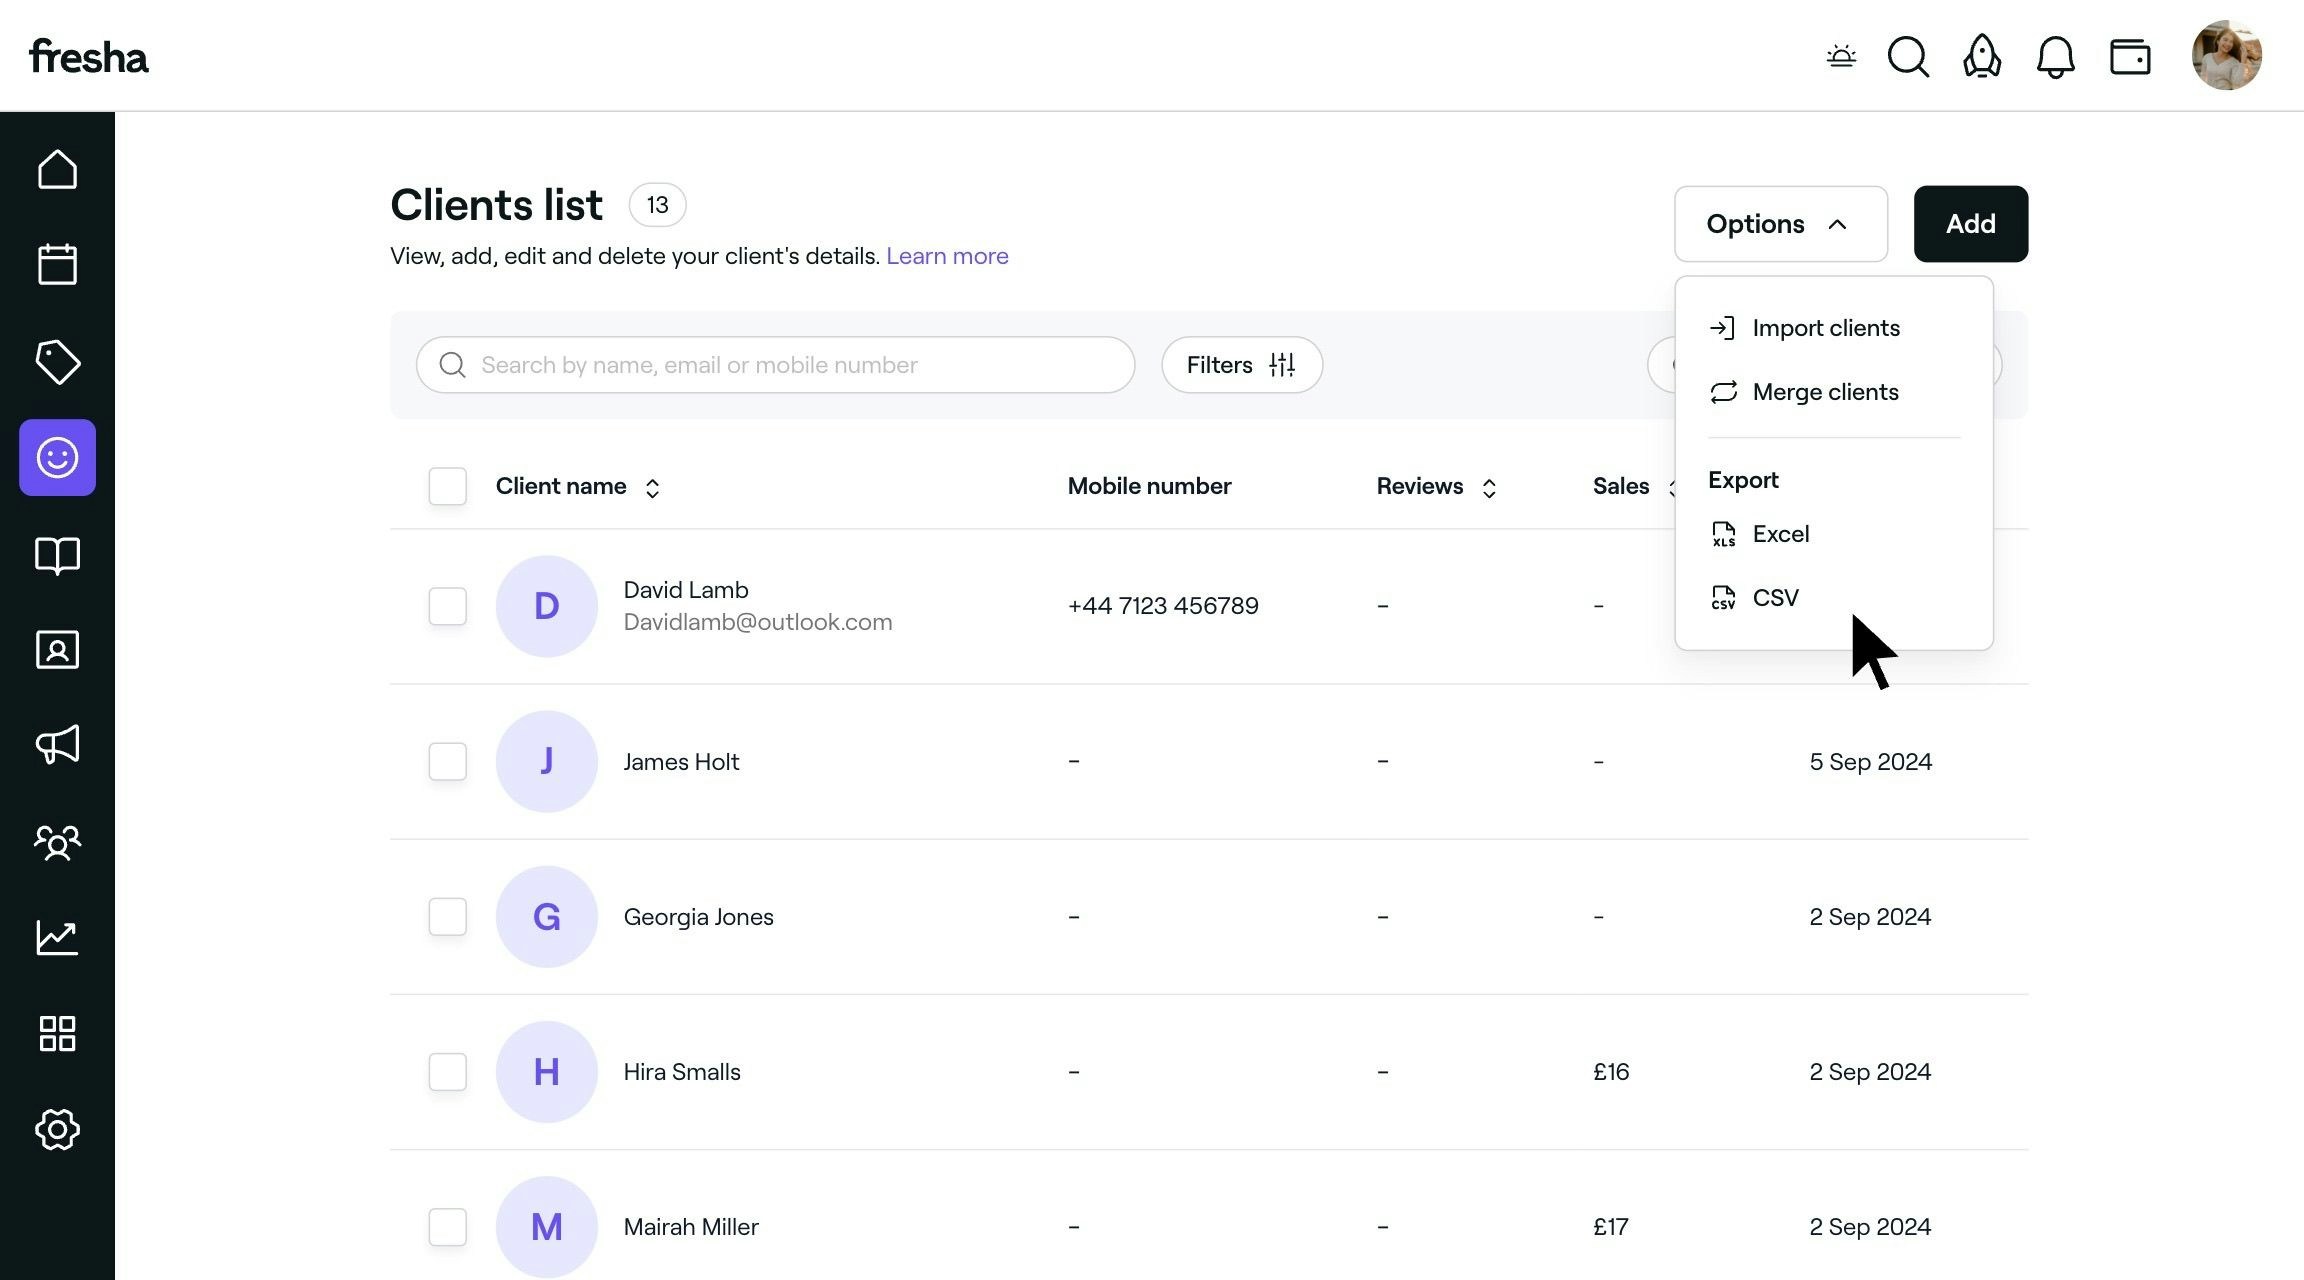
Export the List
Click the Options menu in the top right corner and select CSV format to download the file to your device. This ensures your client data is formatted properly for import into All Set.On Mobile
Step 1
Open Your Clients List
Open the Fresha mobile app and navigate to the Clients tab.Step 2
Review Duplicate Profiles
If duplicates are detected, a purple banner will appear at the top. Tap Review & merge to clean up the data.Step 3
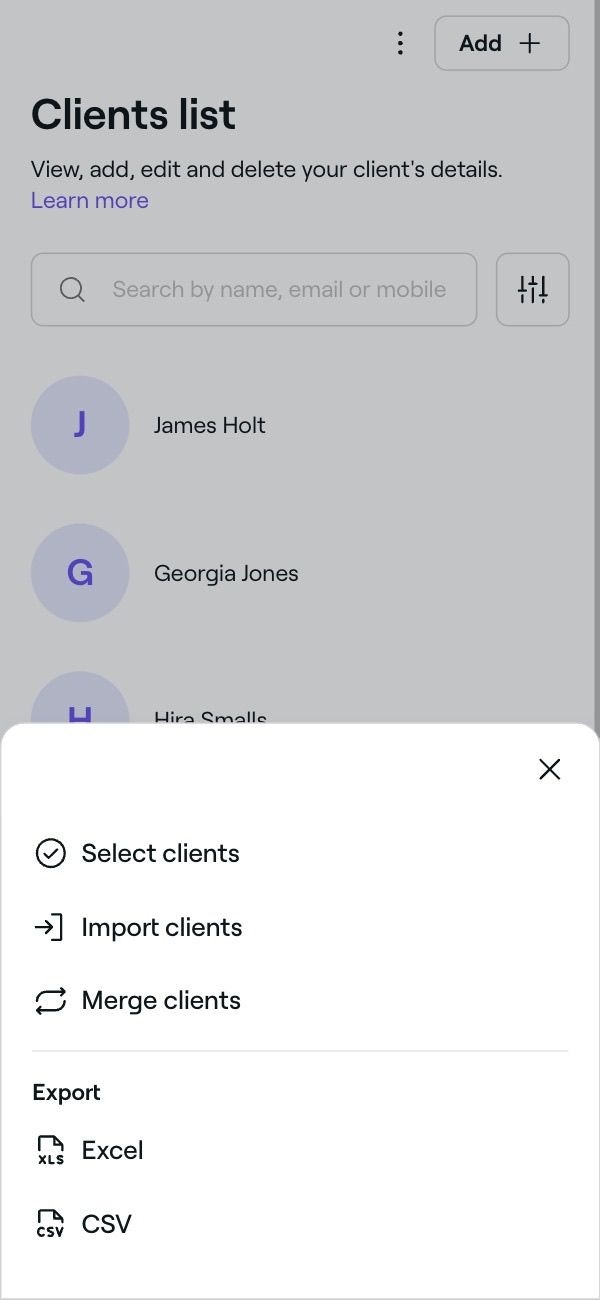
Export the List
Tap the Actions menu (three dots) in the top-right corner and select Export your client list.Step 4