Step 2
Click the Blacklist Icon
At the top middle of the Clients section, click the Blacklist icon to open the blacklist management page.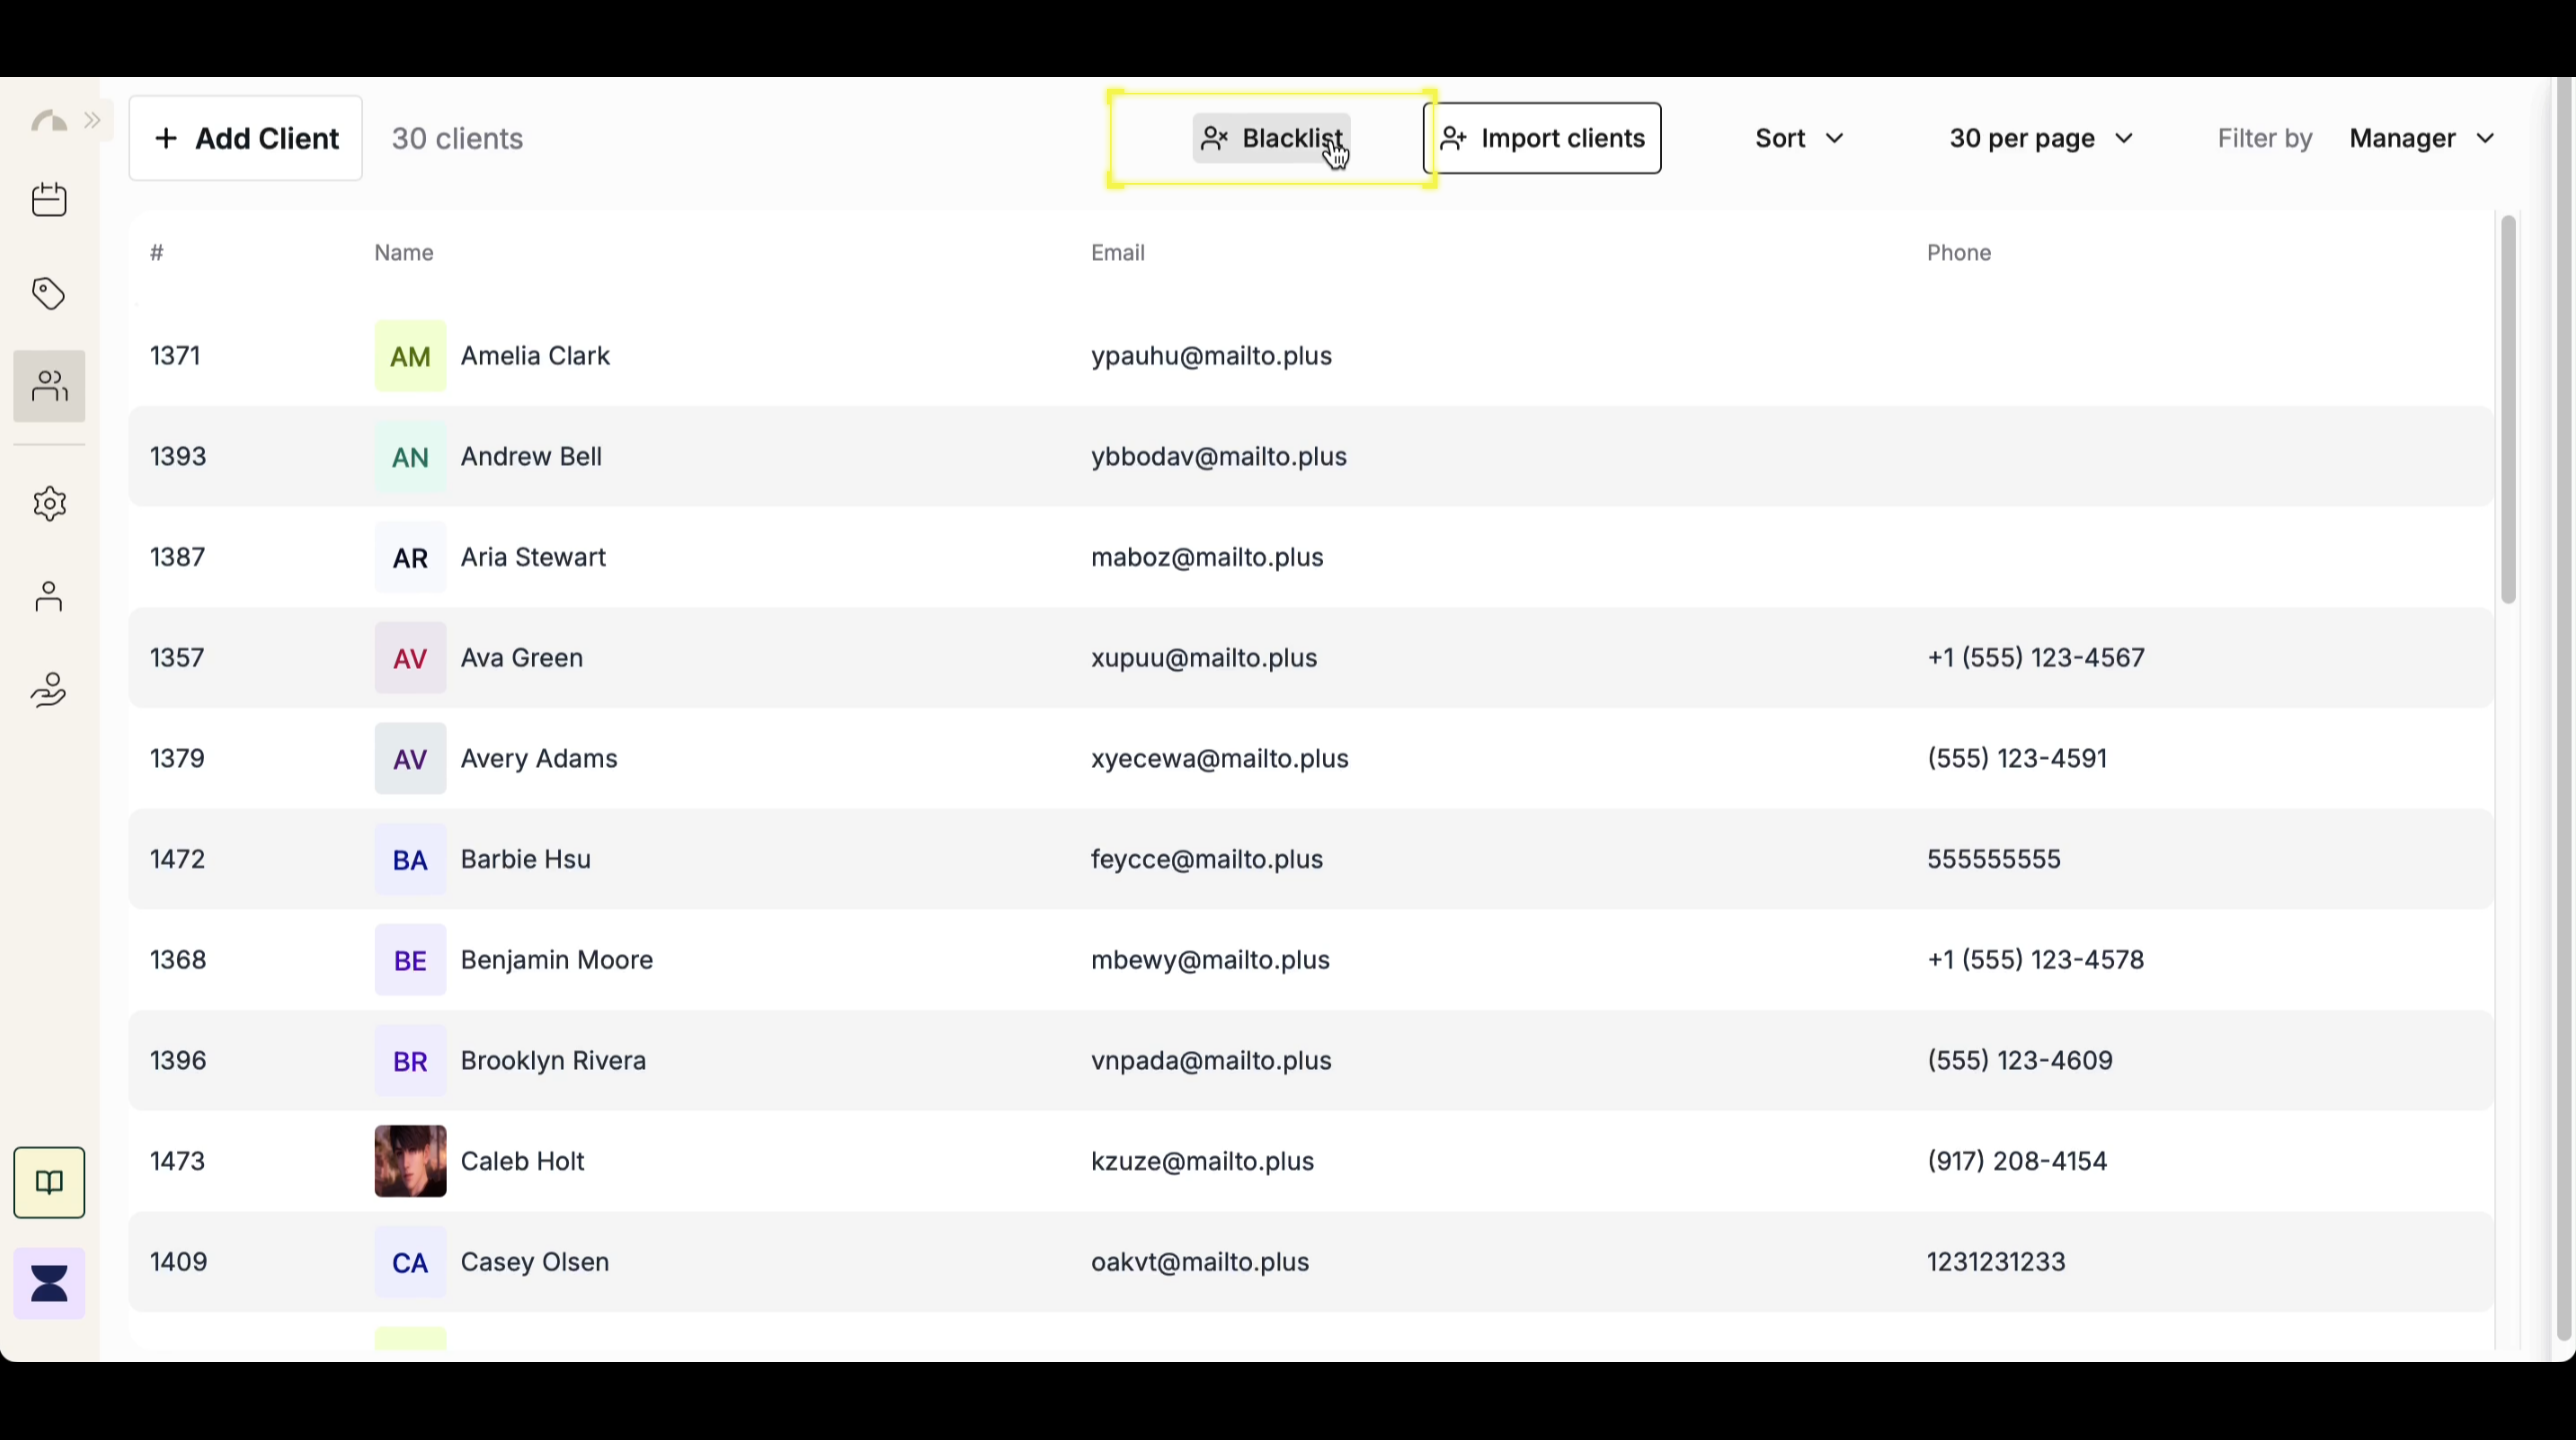
Step 3
Enter Client Email
In the provided field, enter the email address of the client you want to blacklist. This ensures that the system prevents future bookings or purchases associated with this email.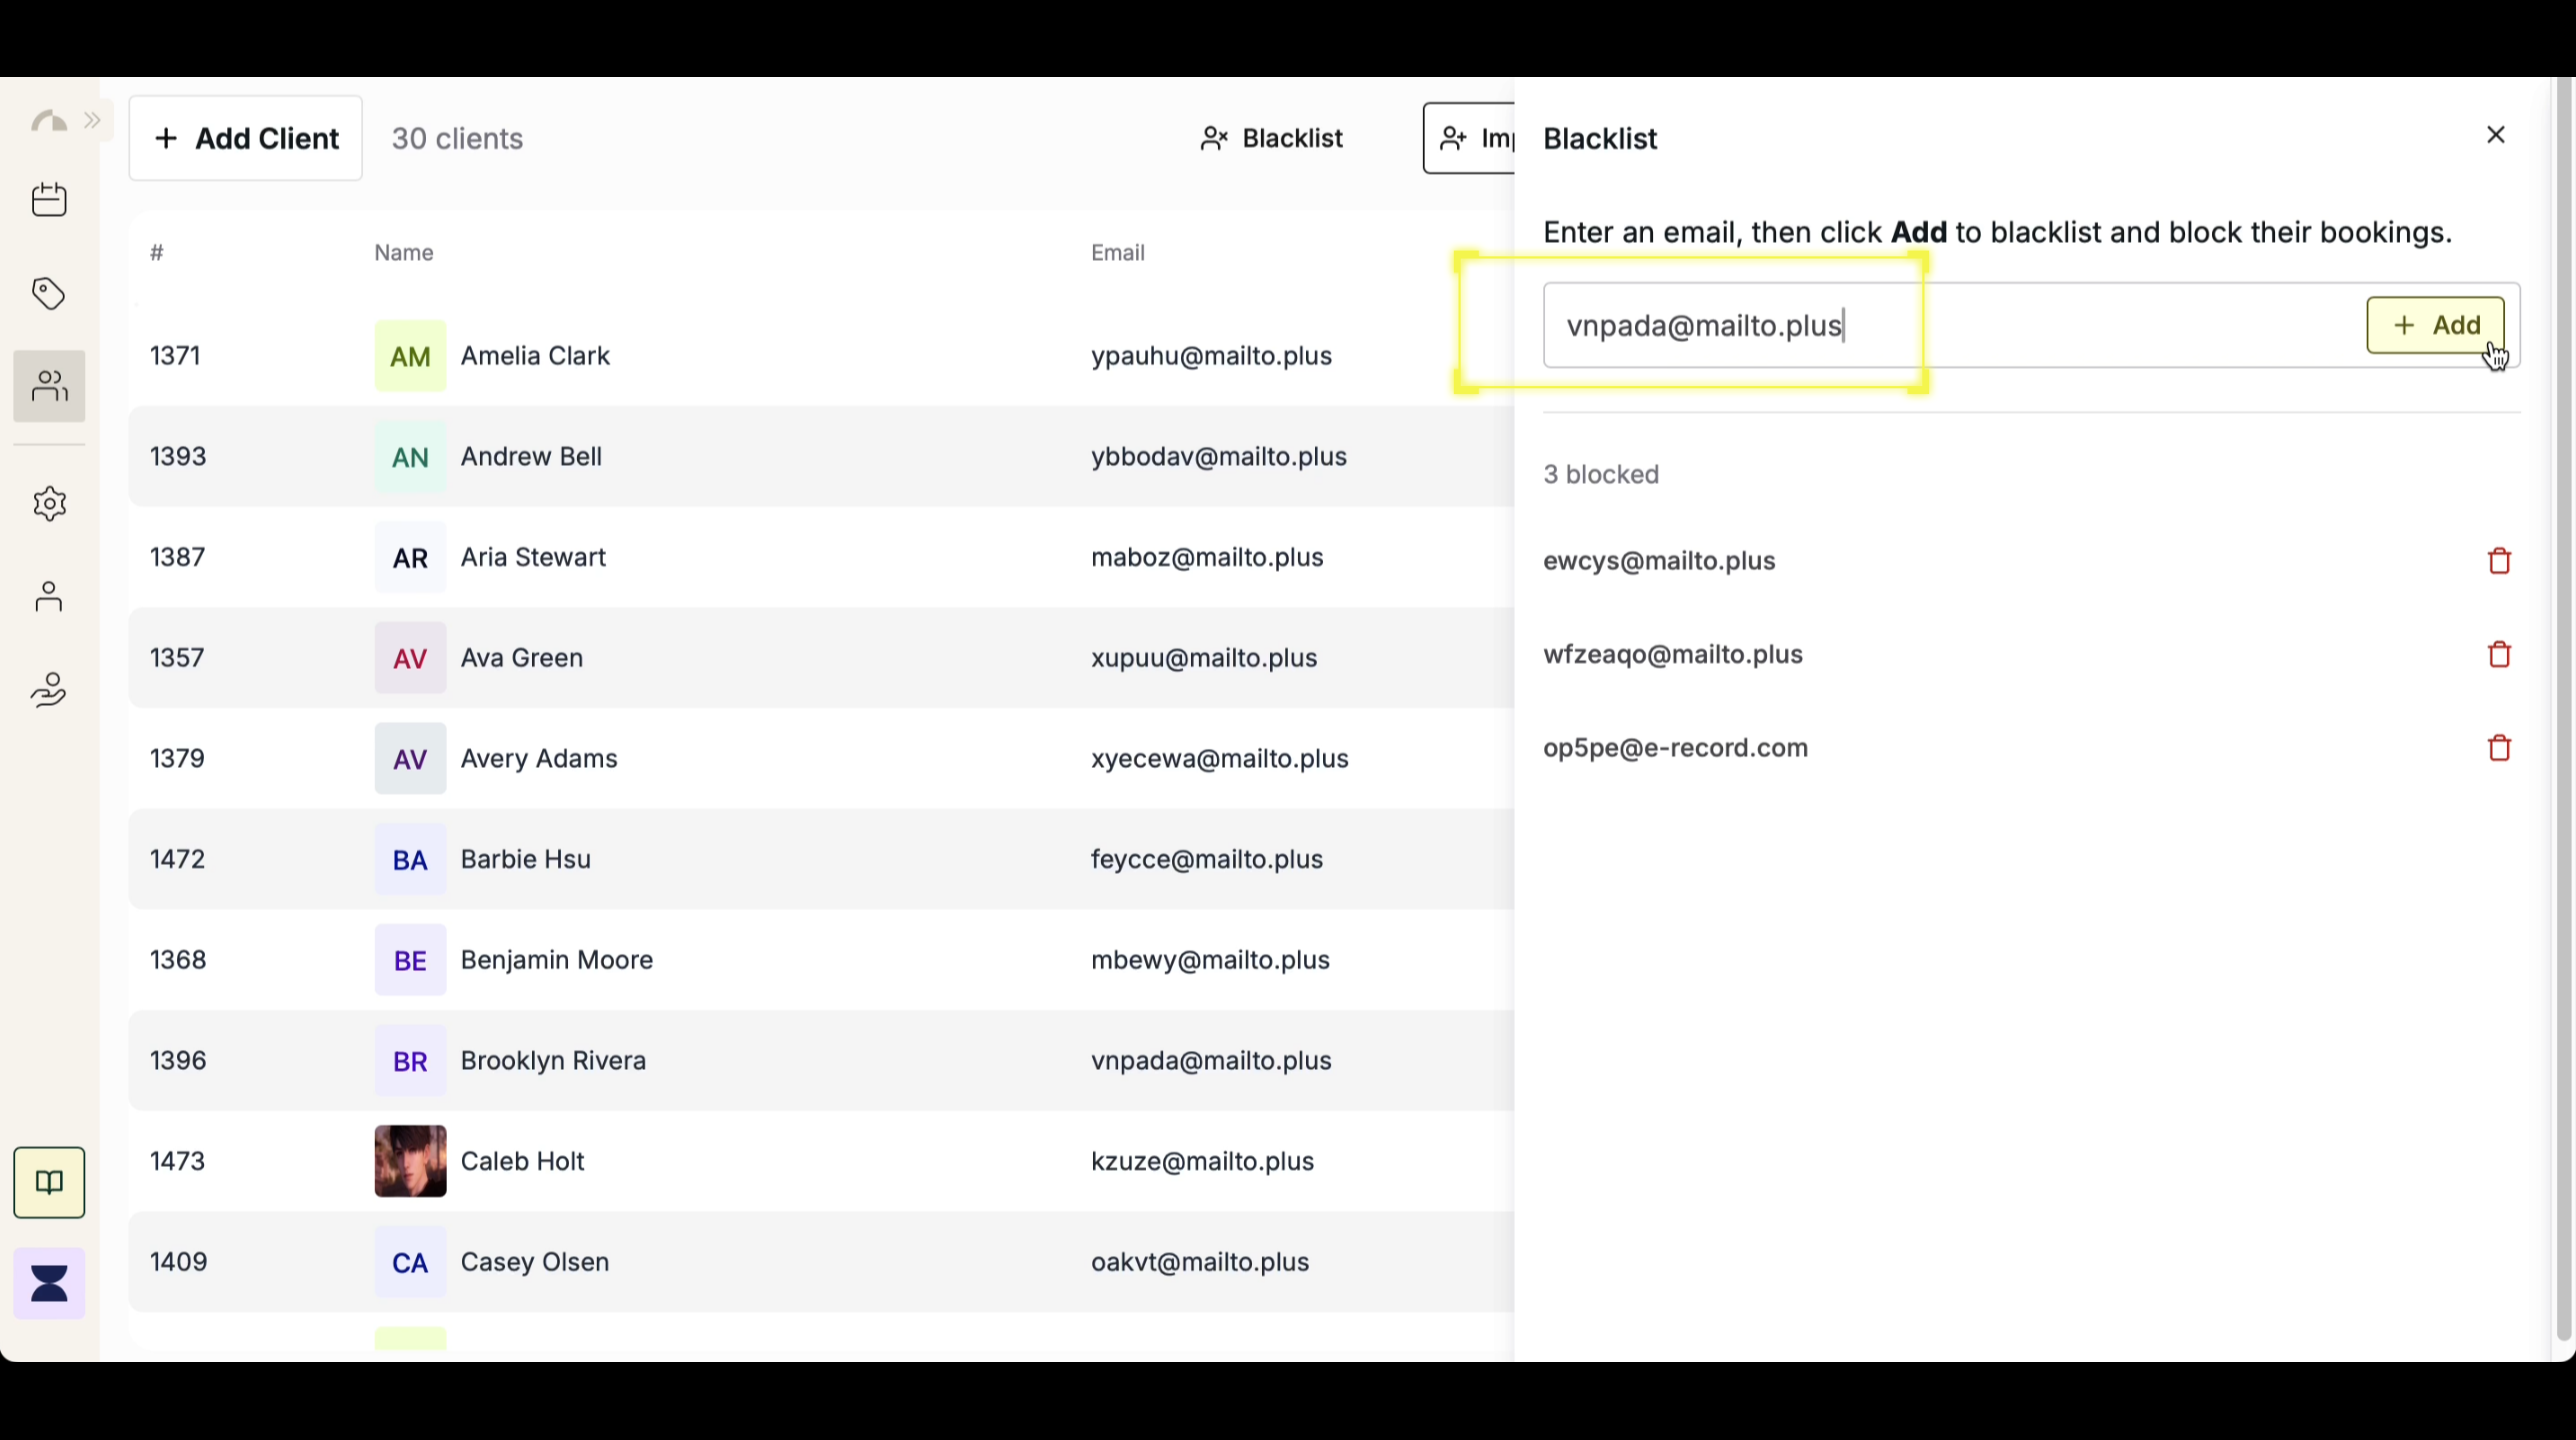
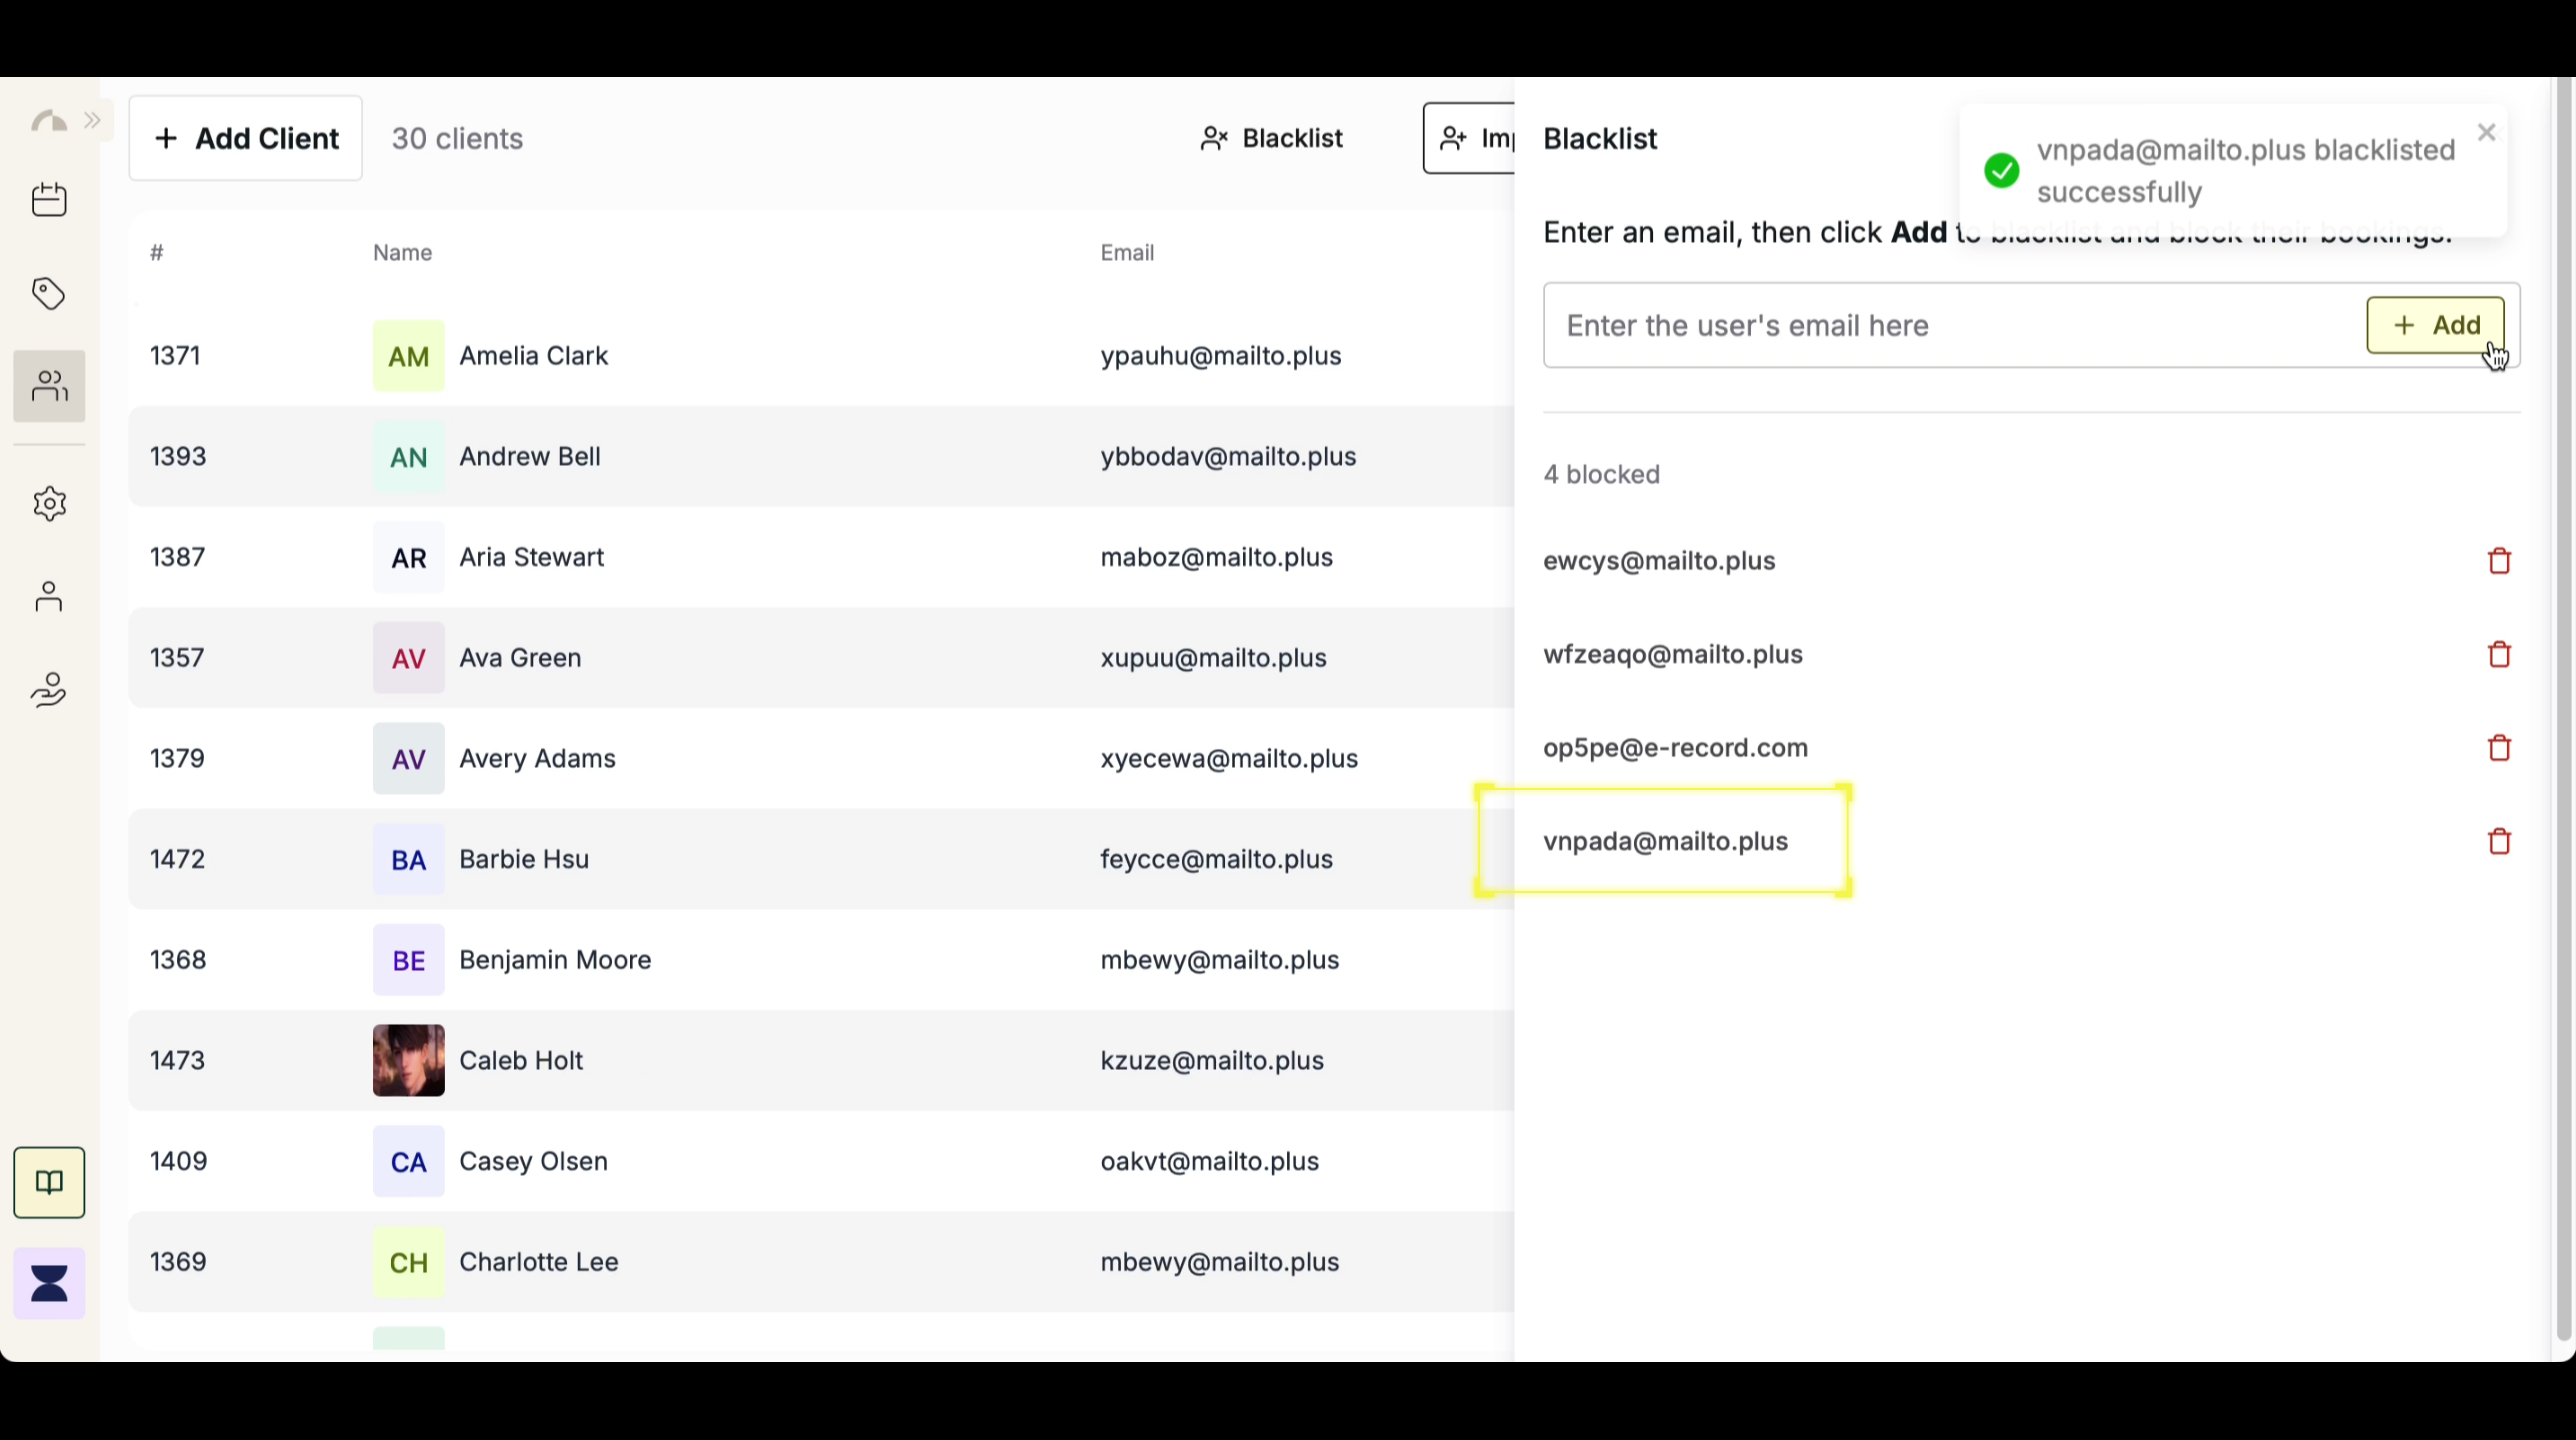
Step 4
Confirm Blacklisting
After entering the email, click “Add” to finalize the action. The system will then add the email to the blacklist, preventing any future bookings from that client.